
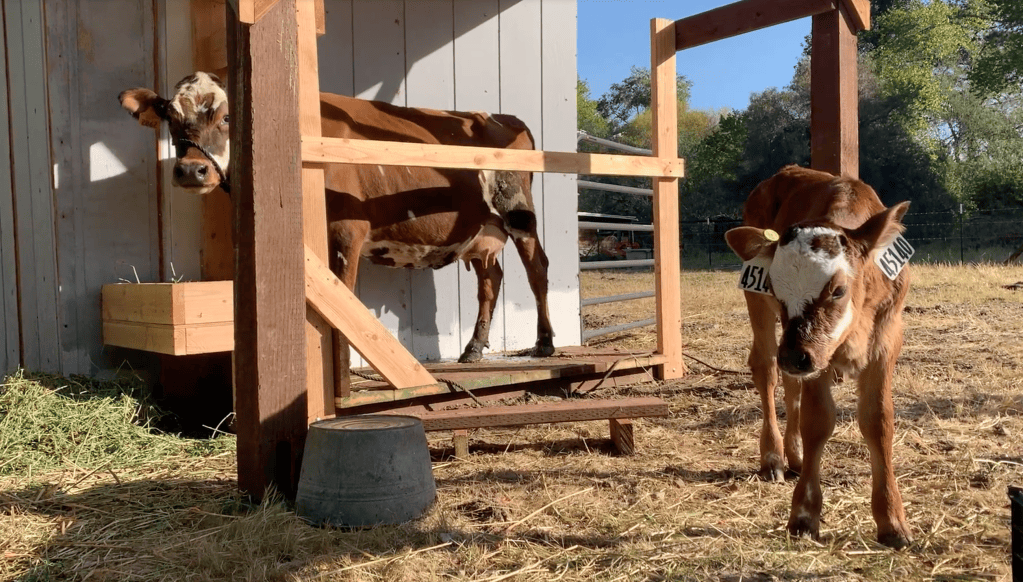
Before bringing our first milk cow home, we made the mistake of assuming that tying her halter to a fence post would be a sufficient enough restraint to keep her still while milking…boy were we wrong, ha! Long story short, we threw together a milking stanchion pretty quickly once we realized that our original plan wasn’t going to work.
Structure
Eventually, as your cow learns to trust you and the milking process, you may not need to use a stanchion. However, it is very helpful to have one available while learning your cow’s temperament and developing your own milking skills and routine. Additionally, having a stanchion available makes working cattle (pregnancy checks, medical treatment, artificial insemination, etc.) so much easier. Easier also means cheaper when paying a vet or AI technician for their services, as they usually charge based on their time spent.
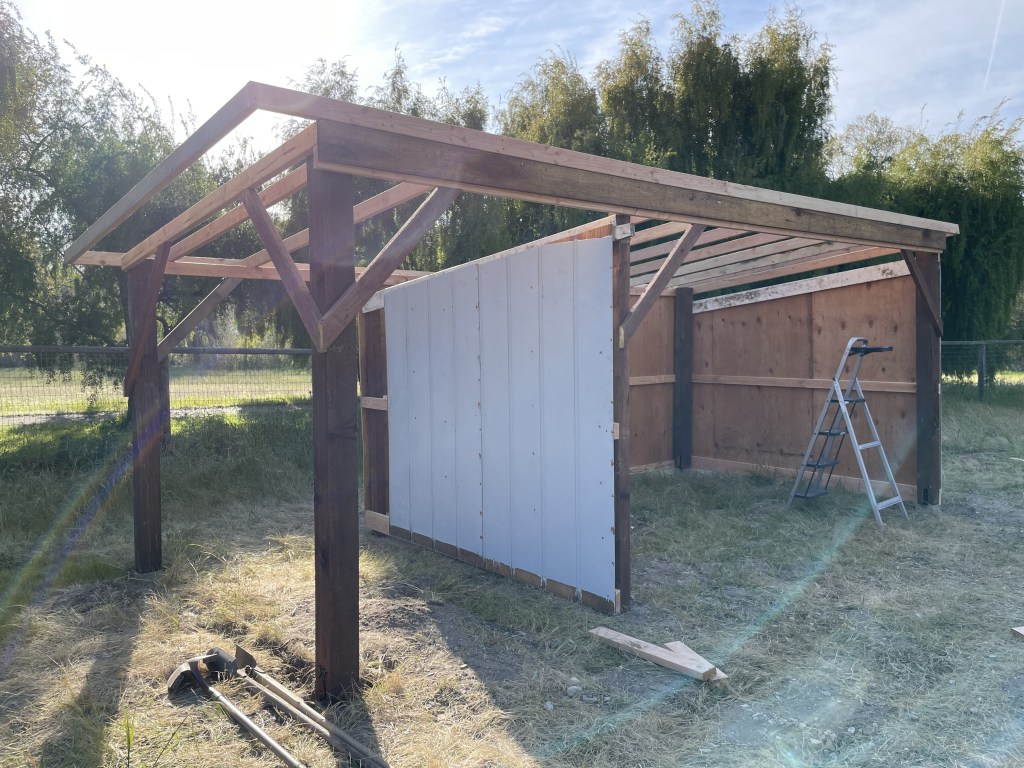
While some who live in harsher climates may prefer to milk inside of a barn, I really enjoy milking outdoors. With a proper structure to provide shade and rain protection, milking outdoors minimizes a lot of the cleaning chores associated with maintaining a clean milking area. Milking outside is also such a wonderful way to start your mornings, soaking in all of that beautiful sunlight and fresh air!
Wherever you choose to set up your milking station, I would advise to keep it somewhat mobile in the beginning. We have moved or modified ours at least 3-4 times in the last three years, as we began to establish our routines and become more familiar with the needs of our cows. Here are a few reasons we needed to modify our set up:
- It was originally positioned directly in the morning sun, which made for a really sweaty milk maid and cranky cow in the summer
- We had set the stanchion against a wall, which did not allow access to one side of the cow. This was only a problem when I suspected an udder injury and could not easily treat that side.
- We moved the entire stanchion to a different location in order to add a “tack wall” of sorts, for halters, ties, etc. This minimized the amount of things that i needed to keep and haul out on my milking cart each morning.
- We have experimented with a solar panel and battery to power the milker and a small light. We had to consider the logistics of sunlight exposure for the panel, wiring, and also safe battery storage (cows have unsupervised access to stanchion).
- In winter months with heavy rain, my shady dirt milking area turned into a soggy mud pit. We temporarily remedied this by adding rubber stall mats, with the intention of eventually pouring a concrete slab for the entire area.
Electricity
Whether you plan on hand milking, or machine milking, it is super helpful to have electricity access wherever your milking set up is.
Now, you can absolutely milk with a battery powered machine, or hand milk in an area with no electricity. Depending on the season, you may have super early morning milkings, or even later evening milkings that will require extra lighting. Another thing to consider is that using anything battery powered leaves more room for equipment failure (ask me how I know). Again, you can make the best call based on the space and means you have to work with. Also know that most likely you will be refining your set up as time goes on, and as you dial in your milking and chore routines. Nothing has to be permanent. Like I said, we have made at least 3-4 changes to our stanchion based on our unique set up and our finicky cow.
Stanchion
While there are pre-fabricated metal milking stanchions available for purchase, they can get very pricey and don’t usually make sense financially for a family homestead. Luckily, you can build one yourself with minimal woodworking skills!
I highly recommend looking up plans, as many have already done the work of measurements and lumber cut lists for you. From there you can tweak the design, if needed, to best fit your space and preferences. Here are a few details to think about when designing and building your milk stanchion:
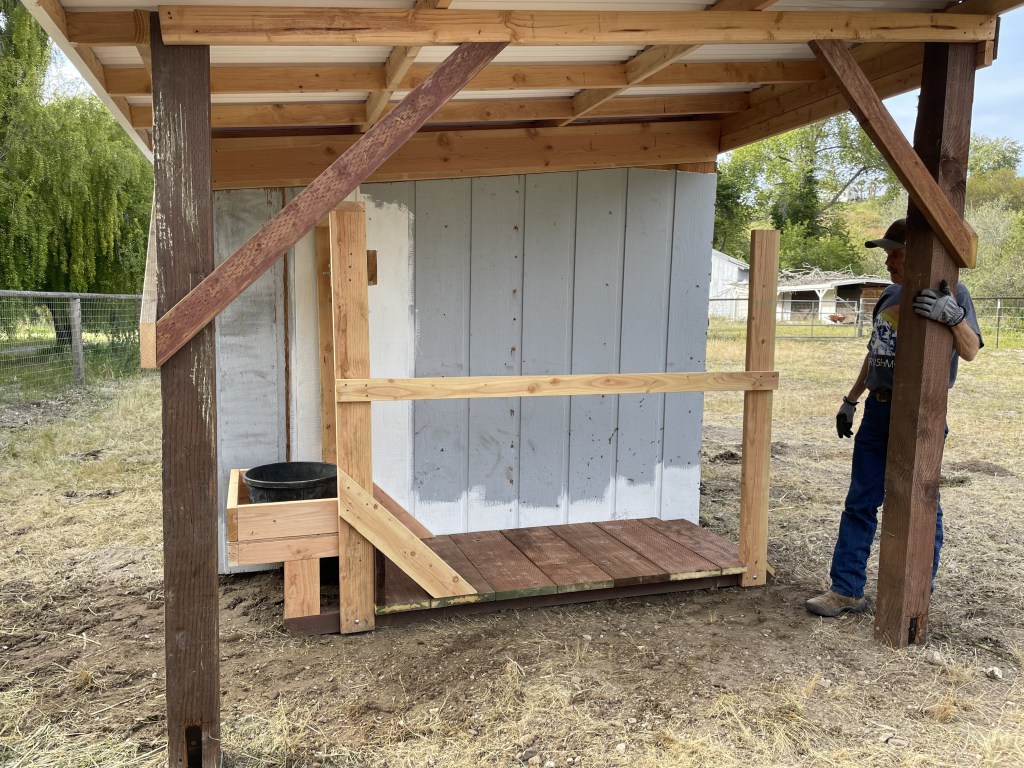
- Using treated lumber for at least the base to prevent rot is wise, as it WILL be getting wet.
- Platform height is a personal preference. I prefer a lower platform, as I am petite and my main milk cow still has a pretty high and tight udder. Lifting my arms above shoulder hight was a concern in the beginning, as I started out hand milking and my shoulders got tired really quickly.
- When building out the platform, be sure to use rougher cut wood planks. Pressure treated lumber should do the trick. Things get really slippery when wet, and cows can get injured very easily if they slip off the platform. Creating as much traction for them as possible will help protect them and you!
- When building the head gate, be sure to have at least two different settings. My cows’ heads vary greatly in size, so it is helpful to have options.
- A feed platform at in front of the head gate is important. Your cow will quickly learn that the milking routine and getting in the stanchion means that they will get treats. This translates to way less headache and work, as a motivated cow is much easier to work with than a stubborn one.
- Be sure to create a cow ramp with plenty of traction. While stepping up into the stanchion in one thing, eagerly exiting after milking is done, is another. Our stanchion has only one ramp in the back (some have one off to the side as well), so our cows know to back out once the head gate is released.
Wash Station and Milk Storage
As you are deciding which type of milking equipment to purchase, and designing your milking area, keep in mind your entire milking process start to finish. Meaning, where will you be storing your clean buckets and milking supplies? Where will you be walking these supplies to for the actual milking? Where will you be bringing the fresh milk back to strain it and clean your equipment? These are important details to take into consideration, as the proper set up will ease the daily chore process (as opposed to creating a dreaded laborious process).
The ability to adapt and be flexible with your set up is key. In time, your skills, process and set up will be fine tuned like a well oiled machine.
Happy Milking!

Leave a comment